Overview of Lenovo ThinkStation P620 and RAM Upgrade
The Lenovo ThinkStation P620 stands out in the realm of powerful workstations, designed primarily for high-demand applications and businesses needing robust processing capabilities. Featuring a cutting-edge AMD Ryzen Threadripper PRO processor, it offers efficiency and speed for various workloads. With an original offering of up to 512GB ECC RAM, the ThinkStation P620 meets the needs of demanding users, but there’s always room for enhancement.
Considering a RAM upgrade can lead to significant performance enhancement. More RAM allows smoother multitasking and faster data processing, vital for applications that require high memory usage like video editing, rendering, or 3D modeling. RAM upgrades can dramatically decrease load times and reduce latency, enhancing the overall system performance and ensuring that tasks are completed more efficiently.
This might interest you : Ultimate handbook: setting up a liquid cooling solution in the cooler master masterbox nr600 for your intel core i9
Typical users who might require additional RAM include graphic designers, engineers, and data scientists. These professions regularly handle large files and complex calculations, demanding more memory than standard configurations provide. By upgrading the RAM of your Lenovo ThinkStation P620, you can ensure that the hardware continues to meet your advanced professional needs, allowing for optimal performance in every workflow scenario. The ThinkStation P620’s flexibility in memory expansion supports ongoing innovation and technological advancement.
Required Tools and Materials for RAM Installation
When preparing to install RAM in your Lenovo ThinkStation P620, having the right tools and materials is crucial. First, ensure you have a reliable set of RAM installation tools. This typically includes a precision screwdriver set, which is vital for safely accessing the hardware components.
In parallel : Boost your gaming experience: a comprehensive guide to minimizing input lag on your amd ryzen 5 5600x and rtx 3060 rig
Next, consider the hardware requirements for your ThinkStation. It supports DDR4 RAM, with a minimum of 8 GB required for standard operations. For optimal performance, installing RAM in pairs is recommended, boosting the system’s capability for demanding tasks.
To ensure compatibility, consult the motherboard specifications. This step avoids mismatches that could lead to installation failures or suboptimal performance.
Beyond the RAM and tools, additional materials enhance the installation process’s safety and efficiency. An anti-static wristband is essential to prevent damaging the hardware with static electricity. Cleaning supplies, like canned air or a soft cloth, are helpful for removing dust before installation, ensuring a clean environment for your new RAM modules.
By gathering these materials, you’re setting the stage for a successful and seamless RAM upgrade, maintaining the longevity and functionality of your Lenovo ThinkStation P620.
Step-by-Step Installation Process
Installing RAM in a Lenovo ThinkStation P620 can significantly improve its performance. This step-by-step guide will take you through the entire RAM installation process.
Preparing the Work Environment
Before beginning the RAM installation process, ensure your work environment is clean and static-free. Gather all necessary tools, such as a screwdriver and anti-static wrist strap. Make sure the ThinkStation P620 is powered off and unplugged to avoid any electrical hazards.
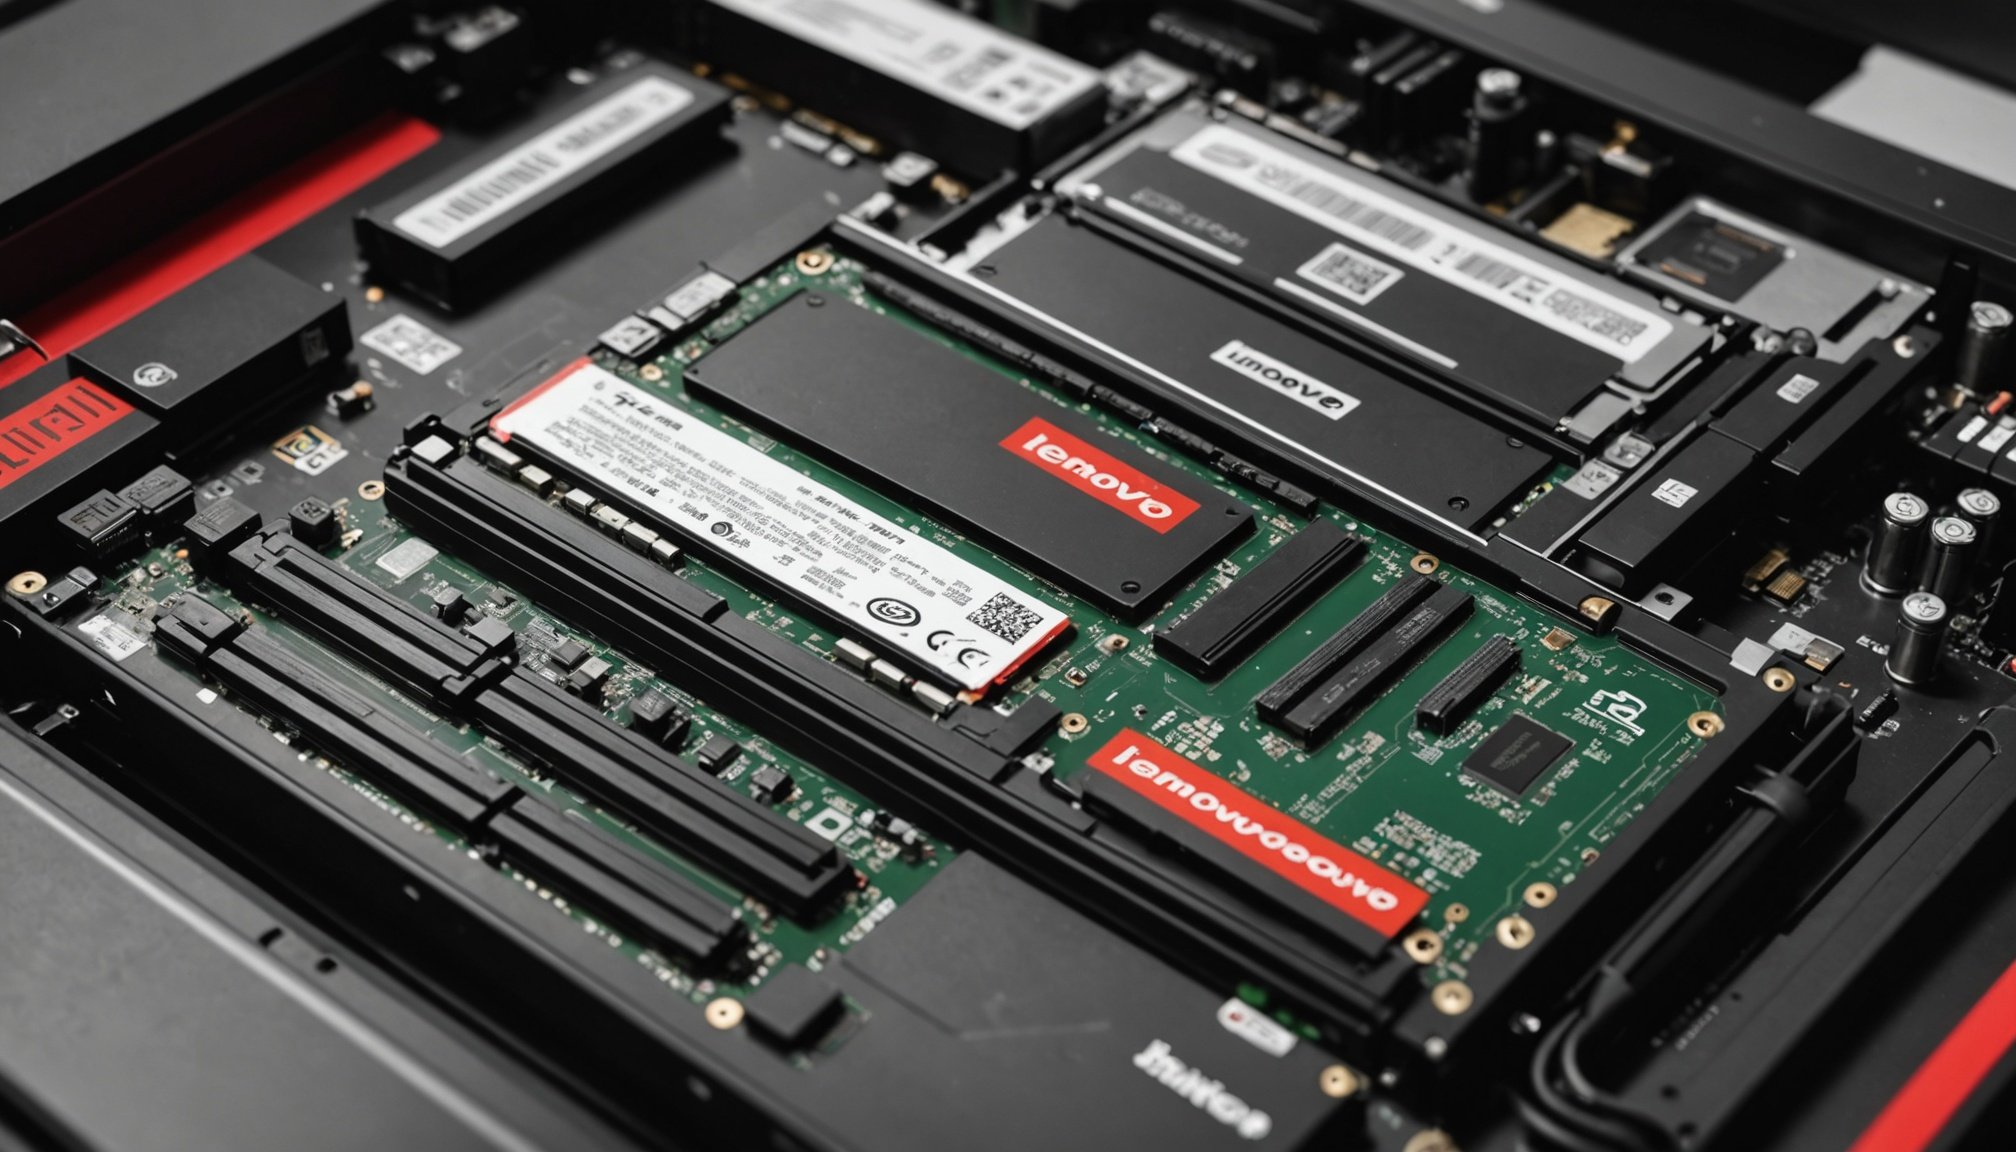
Opening the Lenovo ThinkStation P620
To access the RAM slots, you must first open the ThinkStation P620’s casing. Start by removing any screws securing the side panel. Carefully slide the panel off to reveal the interior components. Take your time to avoid damaging other electronic parts.
Installing the RAM Modules
Before handling any RAM modules, it’s crucial to take precautions like grounding yourself with an anti-static wrist strap. Locate the RAM slots on the motherboard; they are usually aligned in a row. Open the clips on either side of the slot. Align the notches on the RAM module with the tab in the slot, and gently press the module down until the clips snap back into place, securing the module. Repeat the steps if you’re installing multiple modules, ensuring they are properly seated. After installation, replace the side panel and screws to close the casing.
Configuring BIOS Settings
After installing new RAM, properly configuring the BIOS settings is crucial to ensure optimal performance of your system. BIOS configuration directly impacts how efficiently your computer utilizes the memory.
To access the BIOS setup, first restart your computer. As the system begins to boot, press the designated key for BIOS access—usually F2, F10, or Delete. This varies depending on the motherboard manufacturer, so it’s wise to check your manual if unsure.
Once inside the BIOS setup, navigate to the memory settings section. It’s important to ensure that your system recognizes the newly installed RAM correctly. Recommended settings for optimal RAM performance include enabling XMP (Extreme Memory Profile) if supported. This setting allows your RAM to run at manufacturer-specified speeds, increasing compatibility and efficiency.
For systems without XMP, manually adjusting the memory frequency and timings can also yield better performance. Ensure that these settings align with the RAM’s specifications to avoid system instability. Double-check that the memory voltage settings are within the recommended range.
Always remember, altering BIOS settings comes with risks. Incorrect settings can lead to system errors or instability. If you are uncertain, consulting an expert or referring to official documentation is advisable.
Troubleshooting Common Issues
Installing RAM can sometimes lead to unforeseen challenges, but don’t worry—many issues are quite common and manageable. If your system fails to detect the newly installed RAM, it can often be due to improper installation. Double-check if the RAM is seated correctly in the slot. You should hear a click sound when it’s securely in place.
Diagnostic Steps for RAM Detection Problems
-
Reboot your system: Sometimes, a simple restart can solve RAM detection issues.
-
Verify compatibility: Ensure that the RAM is compatible with your motherboard. Consult your motherboard’s manual to confirm this.
-
Check for BIOS updates: Outdated BIOS can prevent your system from recognising new RAM. A BIOS update might be necessary.
Tips for Effective Troubleshooting
-
Use single RAM sticks: If multiple RAM sticks are installed, try using one at a time to identify defective ones.
-
Inspect for dust or debris: Thoroughly clean the RAM slots as dust can interrupt the connection.
By following these steps and diagnosing the potential problems methodically, you can often resolve these issues without needing professional assistance. Taking these precautions will enhance system performance and maximise RAM utility.
Visual Aids and Resources
Visual aids, such as video tutorials and images, significantly enhance the understanding of complex tasks like RAM installation. They bridge the gap between theoretical knowledge and practical application. Individuals embarking on the installation process benefit from these resources as they offer step-by-step instructions that are easy to follow.
Recommended resources include detailed video tutorials showcasing each phase of RAM installation. These contrast the technical jargon typically found in manuals, delivering information in a digestible format. Watching a video allows users to see the techniques and methodologies in action, reducing the likelihood of errors.
Another invaluable resource is visual guides that contain images depicting different stages of the installation. These can serve as quick reference points, and are particularly useful when one needs to verify their progress without replaying entire videos.
While video and image guides are crucial, also consider accessing links to further product recommendations and reading materials. These resources not only augment knowledge surrounding the installation but also offer insight into choosing the right RAM.
By leveraging a combination of these visual aids, individuals are well-equipped to perform RAM installation with greater confidence and precision.
Safety Precautions and Best Practices
RAM installation safety is crucial to protect both the installer and the hardware. Accidents during installation might lead to damage or malfunctions. Here are some key safety measures to follow:
First, ensure you’re working in a static-free environment. Static electricity can damage delicate computer components, including RAM modules. To prevent this, ground yourself by using an anti-static wrist strap. Alternatively, touching a metal object periodically can help dispel any static charge accumulated on your body.
Always turn off your computer and unplug it from the power source before starting any work. This is a fundamental best practice in hardware integrity. It prevents any electrical accidents and ensures your safety while handling sensitive components.
Handle RAM modules carefully by holding them by the edges to avoid contact with the metal pins or circuitry. Direct contact can transfer oils from your skin, which might interfere with connectivity.
It’s advisable to check your motherboard manual for specific guidelines related to RAM installation, as some may require placing modules in particular slots for optimal performance. In addition, make sure the RAM is compatible with your system specifications to ensure smooth operation and hardware integrity. Following these practices ensures a smooth and safe installation process.